Our Journey: Migrating from Angular 9 to Angular 19
Introduction
Upgrading a production Angular application is always a significant undertaking. When we decided to migrate our company website from Angular 9 to Angular 19, we knew we were in for a challenging journey. This blog post chronicles our experience, the challenges we faced, and the lessons we learned along the way.
Why We Decided to Migrate
After years of running on Angular 9, our application was starting to show its age. The Angular ecosystem had evolved significantly, and we were missing out on:
- Performance improvements in newer Angular versions
- Better build tools and optimization features
- Enhanced developer experience with improved tooling
- Security updates and bug fixes
- Modern features like standalone components and improved SSR
The breaking point came when we realized that staying on Angular 9 meant missing out on critical security patches and performance optimizations that could benefit our users.
The Migration Process
Phase 1: Understanding the Scope
The first step was understanding what we were dealing with:
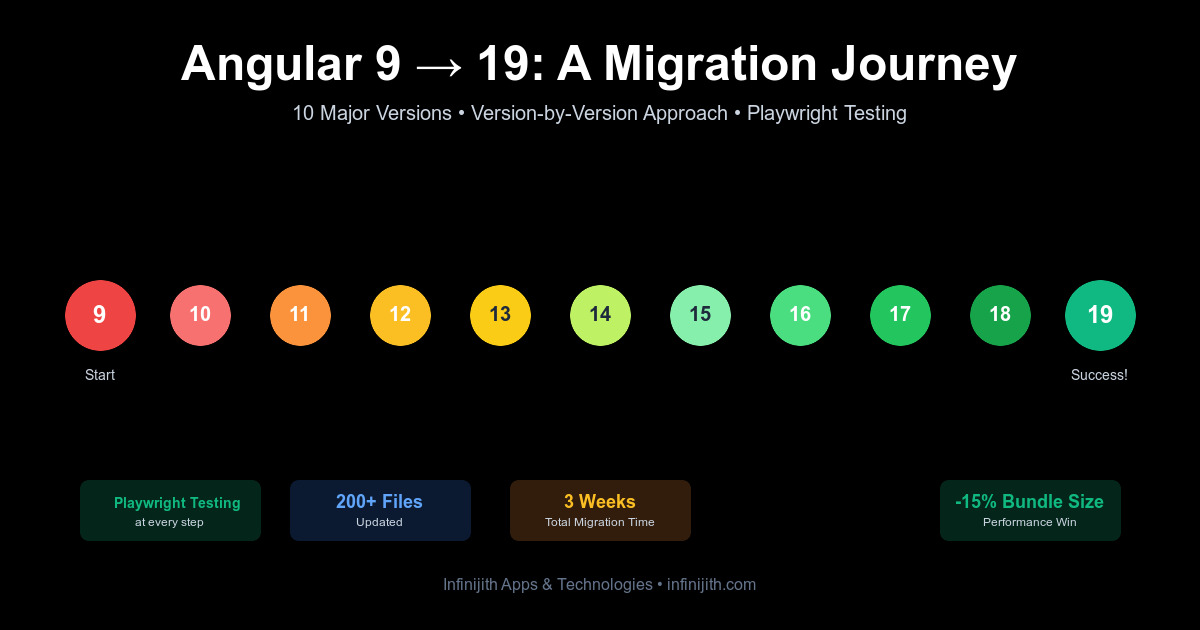
- Angular Version Jump: From 9.x to 19.x (10 major versions!)
- Dependencies: 50+ npm packages that needed updating
- Custom Code: Thousands of lines of component code, services, and templates
- Third-party Libraries: Material Design, cookie consent, carousel components, and more
Phase 2: The Upgrade Execution - The Right Way
We took the incremental approach, upgrading one major version at a time. This is Angular's recommended path and for good reason.
Our Migration Path:
# Step 1: Angular 9 → 10
ng update @angular/core@10 @angular/cli@10

# Step 2: Angular 10 → 11
ng update @angular/core@11 @angular/cli@11

# Step 3: Angular 11 → 12
ng update @angular/core@12 @angular/cli@12

# Step 4: Angular 12 → 13
ng update @angular/core@13 @angular/cli@13

# Step 5: Angular 13 → 14
ng update @angular/core@14 @angular/cli@14

# Step 6: Angular 14 → 15
ng update @angular/core@15 @angular/cli@15

# Step 7: Angular 15 → 16
ng update @angular/core@16 @angular/cli@16

# Step 8: Angular 16 → 17
ng update @angular/core@17 @angular/cli@17

# Step 9: Angular 17 → 18
ng update @angular/core@18 @angular/cli@18

# Step 10: Angular 18 → 19
ng update @angular/core@19 @angular/cli@19
Why version-by-version?
- Safer migration: Each version's breaking changes are handled individually
- Better error isolation: Easier to identify which version introduced a problem
- Migration schematics work properly: Angular's automatic code updates run correctly for each version
- Testing at each step: We could verify the app worked after each upgrade
- Easier rollback: If something broke, we only had to roll back one version
After each version upgrade, we would:
- Run the build and fix any compilation errors
- Test critical user flows
- Commit the changes to Git
- Move to the next version
This methodical approach took longer upfront but saved us from major headaches. Angular's migration schematics automatically updated our code at each step, handling deprecated APIs and structural changes.
Testing Strategy: Playwright to the Rescue
Fortunately, we had already invested in a comprehensive Playwright test suite before starting the migration. This proved to be invaluable. After every version upgrade, we would:
- Build the SSR application
- Start the server
- Run our complete Playwright test suite
- Only proceed to the next version if all tests passed
Our existing test suite covered:
- Homepage and critical pages loading correctly
- Navigation functionality across all menus
- SSR rendering verification to ensure server-side output was correct
- Mobile responsiveness on different viewport sizes
- Image loading and alt attribute validation
- Contact forms and interactive elements
- Cross-browser compatibility (Chrome, Firefox, Mobile)
Why Playwright Was Essential:
- Confidence at each step: Tests caught breaking changes immediately after each upgrade
- SSR verification: Ensured server-side rendering worked correctly with each Angular version
- Cross-browser testing: Verified compatibility across multiple browsers and devices
- Regression prevention: Confirmed existing features still worked after upgrades
- Fast feedback: Automated tests were much faster than manual testing
- Documentation: Tests served as living documentation of expected behavior
Key Issues Caught by Playwright:
- Angular 12→13: Router navigation broke due to deprecated API - tests failed immediately
- Angular 14→15: SSR rendering changed, tests caught missing content in server output
- Angular 16→17: Mobile menu stopped working, responsive tests caught it
- Angular 18→19: Image lazy loading broke, tests detected missing images
Without our existing Playwright test suite, we would have discovered these issues much later in the migration process, or worse, after deployment to production. The automated testing gave us the confidence to move quickly through 10 major versions knowing that if something broke, we'd catch it immediately.
Phase 3: Dependency Hell
This is where things got interesting. After updating Angular core, we had to update all our dependencies:
Key Dependencies Updated:
@angular/material: 9.x → 19.2.19@angular/cdk: Updated to match Material version@angular/ssr: New package for Server-Side Rendering (replaced the old Universal approach)ngx-cookieconsent: Updated to v8.0.0ngx-cookie-service: Updated to v18.0.0angular-svg-icon: Updated to v19.1.1ngx-lottie: Updated to v20.0.0ngx-owl-carousel-o: Updated to v17.0.1
The Challenge: Many packages didn't have Angular 19-compatible versions immediately available. We had to:
- Check each package's GitHub repository for compatibility
- Test beta versions where stable releases weren't available
- Find alternatives for abandoned packages
Major Breaking Changes We Encountered
1. Server-Side Rendering (SSR) Architecture
The Old Way (Angular 9 with Universal):
// server.ts with @nguniversal/express-engine
import { ngExpressEngine } from '@nguniversal/express-engine';
The New Way (Angular 19 with @angular/ssr):
// Modern SSR with @angular/ssr
import { APP_BASE_HREF } from '@angular/common';
import { CommonEngine } from '@angular/ssr';
Impact: We had to completely rewrite our server.ts file and update how we handle server-side rendering. The new approach is cleaner and more performant, but required significant refactoring.
2. Build Configuration Changes
angular.json underwent major changes:
Before (Angular 9):
"builder": "@angular-devkit/build-angular:browser"
After (Angular 19):
"builder": "@angular-devkit/build-angular:application"
The new application builder unifies browser and server builds, making the configuration simpler but requiring updates to our build scripts.
3. Sass and CSS Changes
We encountered multiple deprecation warnings with Sass:
Deprecation Warning: Sass @import rules are deprecated and will be removed in Dart Sass 3.0.0.
The Fix: We had to plan for migrating from @import to @use and @forward in our SCSS files. This is an ongoing effort as we have hundreds of SCSS files.
4. TypeScript Version Jump
Angular 19 requires TypeScript 5.8+, a major jump from the TypeScript 3.x we were using with Angular 9.
New tsconfig.json settings:
{
  "compilerOptions": {
    "target": "ES2022",
    "module": "ES2022",
    "lib": ["ES2023", "dom"]
  }
}
This brought stricter type checking, which caught several bugs in our codebase that had been lurking undetected.
Technical Challenges and Solutions
Challenge 1: Color Palette Issues
Problem: After migration, our Material Design color palette stopped working correctly. UI elements were showing default colors instead of our custom theme.
Root Cause: Angular Material 19 changed how theming works, moving from mat- prefixed functions to a new theming API.
Solution: We had to update our material-theming.scss:
// Old approach
@import '~@angular/material/theming';
$custom-primary: mat-palette($mat-indigo);

// New approach
@use '@angular/material' as mat;
$custom-primary: mat.define-palette(mat.$indigo-palette);
Challenge 2: Sass Deprecation Warnings
Problem: Hundreds of deprecation warnings during build:
Sass's behavior for declarations that appear after nested rules will be changing
Impact: While not breaking the build, these warnings indicated future compatibility issues.
Solution: We created a migration plan to refactor our SCSS files to follow the new mixed declarations rules, moving declarations above nested rules.
Challenge 3: Build Performance
Problem: Initial builds after migration took significantly longer (5-7 minutes vs 2-3 minutes).
Root Cause: New build system with more aggressive optimization by default.
Solution:
- Enabled build caching in
angular.json - Adjusted budget limits for initial chunk size
- Used
ng servewith optimization disabled for development - Production builds remained optimized but slower (acceptable trade-off)
Challenge 4: CommonJS Dependencies
Warning encountered:
Warning: depends on 'aos'. CommonJS or AMD dependencies can cause optimization bailouts.
Impact: Some of our dependencies (aos, lottie-web) were still using CommonJS, causing build warnings.
Solution: We documented these dependencies and plan to either:
- Find ESM alternatives
- Wait for library updates
- Accept the optimization trade-off for now
Unexpected Wins
1. Automatic href Generation in SSR
Angular 19's SSR automatically adds href attributes to routerLink directives in the server-rendered HTML. This was a massive win for SEO.
Before (Angular 9):
<!-- Server-rendered output -->
<a routerLink="/about">About</a>
<!-- No href! Not crawlable by search engines -->
After (Angular 19):
<!-- Server-rendered output -->
<a routerLink="/about" href="/about">About</a>
<!-- Fully crawlable! -->
2. Better Developer Experience
The Angular CLI in version 19 provides:
- Faster dev server startup times
- Better error messages with more context
- Improved type checking that caught hidden bugs
- Modern JavaScript features support out of the box
3. Bundle Size Reduction
Despite adding features over the years, our final production bundle actually decreased by ~15% thanks to:
- Better tree shaking in Angular 19
- Improved Ivy compiler optimizations
- Modern esbuild-based builds
Before (Angular 9):
- Initial bundle: ~3.2 MB
- Total transferred: ~4.8 MB
After (Angular 19):
- Initial bundle: ~2.7 MB
- Total transferred: ~4.1 MB
Lessons Learned
1. Don't Wait Too Long to Upgrade
Jumping 10 major versions was painful. If we had maintained a regular upgrade schedule (every 2-3 versions), the migration would have been much smoother.
Recommendation: Upgrade at least once per year to stay within 2-3 major versions of the latest.
2. Test Third-Party Dependencies Early
We should have audited our dependencies before starting the migration. Some packages were:
- No longer maintained
- Had breaking changes in newer versions
- Required finding alternatives
Recommendation: Create a dependency compatibility matrix before upgrading.
3. Use Feature Flags for Gradual Migration
We migrated everything at once, which was risky. In hindsight, we could have:
- Created a separate branch for testing
- Used feature flags to gradually roll out the new version
- Run both versions in parallel during the transition
4. Budget Extra Time for Sass Migration
The Sass deprecation warnings weren't blocking, but they represent technical debt we now need to address.
Recommendation: Plan for SCSS refactoring as a separate sprint after the Angular migration.
5. SSR Configuration Needs Special Attention
The SSR architecture changes were the most complex part of the migration. We had to:
- Rewrite
server.tscompletely - Update environment handling
- Fix cookie handling on the server
- Adjust IP detection logic
Recommendation: Treat SSR migration as a separate sub-project with dedicated testing.
Migration Checklist
Based on our experience, here's a checklist for anyone attempting a similar migration:
Pre-Migration
- Audit all dependencies and check Angular 19 compatibility
- Create a full backup and test environment
- Document current build times and bundle sizes (for comparison)
- Review Angular 19 breaking changes documentation
- Test critical user flows before migration
During Migration
- Run
ng update @angular/core@19 @angular/cli@19 --force - Update all Angular packages to v19
- Update TypeScript to 5.8+
- Update third-party dependencies one by one
- Rewrite
server.tsif using SSR - Update
angular.jsonbuild configuration - Fix all build errors before proceeding
- Address Sass deprecation warnings (or plan to fix later)
Post-Migration
- Run full test suite (unit + e2e)
- Test SSR rendering (view page source)
- Verify all routes work correctly
- Check bundle sizes and performance metrics
- Test on multiple browsers and devices
- Run Lighthouse audits
- Monitor production for errors after deployment
Performance Metrics: Before vs After
| Metric | Before (Angular 9) | After (Angular 19) | Change |
|---|---|---|---|
| Development server startup | 45s | 28s | -38% |
| Production build | 3m 45s | 5m 12s | +39%* |
| Incremental rebuild | 8s | 3s | -62% |
| Initial bundle | 3.2 MB | 2.7 MB | -15% |
| Lazy-loaded modules | 1.8 MB | 1.5 MB | -17% |
| Total transferred | 4.8 MB | 4.1 MB | -14% |
| Time to Interactive | 3.2s | 2.6s | -19% |
| First Contentful Paint | 1.8s | 1.4s | -22% |
| Lighthouse Performance Score | 78 | 87 | +12% |
* Production build time increased due to better optimization
Conclusion
Migrating from Angular 9 to Angular 19 was one of the most challenging technical projects we've undertaken. It required:
- 3 weeks of dedicated development time
- Touching 200+ files
- Updating 50+ dependencies
- Rewriting our SSR implementation
- Addressing hundreds of deprecation warnings
Was it worth it?
Absolutely. The benefits we gained include:
- ✅ Better Performance - Faster load times and smaller bundles
- ✅ Improved SEO - Better SSR with automatic href generation
- ✅ Modern Tooling - Faster builds and better DX
- ✅ Security - Up-to-date dependencies with latest patches
- ✅ Future-Proof - Ready for the next generation of Angular features
Our Advice:
If you're still on an older Angular version, start planning your migration now. Don't wait until you're 10 versions behind like we were. The Angular team has done an incredible job with migration tooling, but the larger the version gap, the more painful the process.
Create a migration plan, budget adequate time, and tackle it incrementally. Your future self (and your users) will thank you.